To clear up blocked wash basins or for work with clogged toilets in the home both serves as basic tools. However, in order to do their tasks well and stay clean, they need proper cleaning and storage. This brief guide gives you information on how to maintain your plunger in tip-top shape all the time.
Plungers are a simple but reasonable tool to keep your home’s plumbing systems free of dirt and germs. Do not clean out the foul toilet bowl water. Germs live quickly around half-even-dry droplets of dirty water. A properly maintained plunger will last longer and remain clean.
This article explains the different types of plungers, why it is important to store and clean them properly, then gives step-by-step instructions on how to store a plunger so it is being preserved well.
What different types of plungers are there
Knowing about the different types of plungers and what they are used for will help you take more care of ’em.
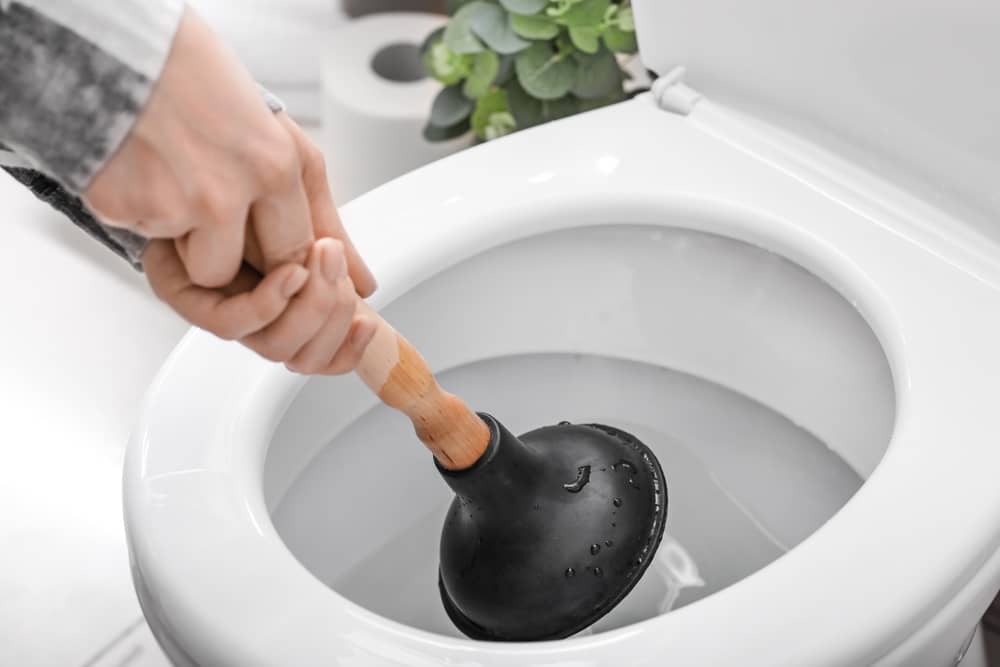
Cup Plunger
For most sinks and bathtubs, you use a cup plunger. It has a simple rubber cup attached to one end of a straight handle. Constructed to seal around the drain as it is pressed down onto its base (which is supposed be flat), this model will create the needed suction to clear blockages. This type of plunger can be used in many ways, but is much less effective in toilets because usually the bowl’s shape does not provide an even surface on which to press your tool.
Flange Plunger
A flange plunger is a toilet plunger with an extra rubber flap that folds out inside the cup. This flange, or extension, fits nicely into the toilet drain, so it’s even more effective for clearing toilets. The design gives a tighter seal and harder plunge action than other models of plunger like the cup-shaped ones. Flange Plunger are appropriate only when necessary to unblock sinks or bathtubs both at home and later with similar water-based problems (as we shall explore elsewhere in this guide) you may encounter in public bathrooms as well as residential facilities throughout Japan for example.
Accordion Plunger
The base of accordion plunger is made from hard plastic, they’ve an accordion-like design. They are used mainly for toilets, and applying strong suction. Multiple ridges increase the force applied to the clog, which makes this kind of plunger particularly effective on difficult blockages. It might also be less versatile for other types of places.
Why Cleaning and Storing Plungers Is Important
Plungers can pick up a lot of dirt and bacteria from their time in toilets, and few people remember the fact that they’ve gotten pulled out of that black hole then poured down all over your elegant pink tiled bathroom when you’re finished using them.
Redundancy in prevention How to store and clean them When, properly cared for, a plunger is much better and lasts longer than one that has been allowed to go to seed. That will save you cash in the end too; of course, it will also save you a lot of extra work. It is very important for the plunger’s maintenance and health to learn the correct way to store one.
How to Clean Your Plunger
What You Need
- Hot water
- Bleach or disinfectant
- Bucket
- Rubber gloves
- Old toothbrush or scrub brush
- Step-by-Step Cleaning Process
Step 1: Rinse Thoroughly
Start cleaning with by rinsing the cup with hot water. You’ll wash away any visible dirt. To protect your hands from contact with germs, wear a pair of rubber gloves.
During the first rinse, all that loose dust and grease clinging to the outer cover of your plunger will drop right off. This will make it so much easier for cleaning in subsequent steps. Then it’s an easy matter merely to use your toilet brush to clean away the last vestiges of the filth.
Step 2: Disinfectant Immersion
Fill a bucket with hot water and a disinfectant (like bleach). The typical dilution ratio is one cup bleach to one gallon of water. Place the plunger in the liquid and let it settle for 5–10 minutes. Killing germs and bacteria with your plunger. The timing is critical.
Step 3: Brush Plunger
After soaking, clean the rubber cup and handle with a small toothbrush or fingernail brush. Spend a little extra time on the slit where dirt and bacteria can gather. By brushing it you remove any lingering traces of lysol, including M. tuberculosis bacterium hanging onto the tools for thought transmission.
Step 4: Rinsing and Drying
Rinse the plunger once more under hot water to wash away any remaining disinfectant, or put it in a bucket of cold water and let it slosh around for a full minute. Make sure to wash off all the soap and bleach thoroughly so that the rubber piece will not be damaged. Then shake off most of the water from the plunger, letting it dry completely before putting it away. This is to stop mold fungi and mildew spores from breeding in such a damp place as this.
How to Store A Plunger
Proper storage of your plunger is as important as cleaning it. The correct method of storing a plunger will enlarge its useful life and keep it clean.
Don’t Store In Enclosed Spaces
Don’t keep the plunger in a closed cabinet or drawer right after use. This encourages mold and bacteria to grow. It must be completely dry before putting it away so as not to develop germs.
Use Plunger Stand
Get a plunger stand to keep your plunger off the floor and providing it with its own space. Plunger stands allow for drying of the plunger. They also do much in terms of preventing drips and streaks from polluting your floor and bathroom. Such as knowing the right way to store a plunger with a stand…
Avoid Storage Near Other Cleaning Tools
Store the plunger separate from other cleaning tools in order to avoid cross-contamination. This will reduce the chance of spreading germs with the plunger to other surfaces and materials in your home.
Location
You can store your plunger in a convenient, and yet private, location, such as behind the toilet or in a utility closet. When it’s time to use it again, bring it out quietly but without any noticeable markings of where you might have put it to dry off previously! Keeping a bathroom looking neat involves knowing how to store a plunger effectively.
Tips on Proper Plunger Cleaning
Clean Regularly
Every time you use your plunger, such as after each time it is used to unblock a toilet, clean it. Dirty, smelly plungers are less sanitary, and cleaning it often helps to ensure that the plunger will actually work.
Check for Damage
Regularly inspect your plunger for signs of wear and tear. If the rubber is cracked or if there are any breaks in it above where you hold it, get a new one to avoid problems. A damaged plunger can be less effective and even cause damage to the other pipes if flushed down them.
Label Plungers by Their Purpose
If you own several plungers for different tasks, be sure to label them so you don’t try using a toilet plunger in your sink or bathtub and draw the wrong conclusion! This practice helps California avoid cross-contamination and makes sure that one always has the right tool for each task at hand.
Keep It Fresh
After you scrub the plunger, it seems to always keep that smell around. Baking soda is a natural deodorizer that absorbs odors, skipping the need for any harsh chemicals.Just add a light coating of baking soda to the plunger and allow it two or three minutes there. Then put away in a windinance placef
Thorough Plunger Cleaning
Every so often (say, every month) soak the plunger in hot water and vinegar for a while to air it out. Vinegar is a natural antiseptic. It can help breathe new life into even the most stubborn grime and kill bacteria. Let it soak for about 30 minutes, then rinse as per usual. At the same time; it will eep your bathroom smelling rosey.
Storage Solutions
Also, try the newest storage options. Wall-mounted racks or under-sink organizers can effectively put your plunger out of the way while still leaving it easily accessible. These storage options assist in maximizing space and maintaining a tidy look for your bathroom.
A better-organised bathroom can result if you know the landing spot and the right way to put away your plunger. For any further persistent plumbing issues, don’t hesitate to reach plumbing contractor in Semmes AL or electrician in Fairhope AL for professional service.
Keep an eye for more latest news & updates on Postery!